en
it

Deutschland

Italia

España

United Kingdom

United States

Lietuva

Thermion Duo
Manual
Thermion Duo

Table of contents

Troubleshooting

For technical support please contact support@pulsar-vision.com.

Answers to frequently asked questions about the devices can also be found in the FAQ section.

Possible cause

The Battery Pack is empty

Solution

Charge the Battery Pack

Solution

In case of any malfunctions during operation, try resetting the device by long pressing the ON/OFF button for 10 seconds.

Possible cause

USB cable is damaged.

Solution

Replace USB cable.


Possible cause

The external power supply is discharged.

Solution

Charge the external power supply.

Possible cause

Calibration is required.

Solution

Perform image calibration according to Calibration Mode section.

Solution

If the image does not clear after calibration, you need to recalibrate.

Possible cause

After turning on the device, it takes some time for the sensor temperature to stabilize. This is normal and is not a defect.

Possible cause

The dioptre adjustment range is not enough for your eyesight.

Solution

If you wear glasses with a range of -3/+5, keep glasses on when looking through the eyepiece.

Possible cause

The device was exposed to static electricity during operation.

Solution

After exposure to static electricity, the device may either reboot automatically, or require turning off and on again.

Possible cause

Brightness or contrast level is too low.

Solution

Adjust the brightness or contrast in the Quick Menu.

Possible cause

Dust and condensation are covering the outside or inside optical surfaces.            

Solution

Wipe the outer surface of the objective lens with a soft cotton cloth. Dry the riflescope. Let it stand for four hours in a warm room.


Possible cause

The lens of the thermal imaging channel is not focused.

Solution

Adjust the clarity of the image by turning the focus knob of the thermal imaging channel lens.


Possible cause

The riflescope is not mounted securely or the mount was not fixed with thread sealant.

Solution

Check that the riflescope has been securely mounted.

Make sure you are shooting the same cartridge and load as when the weapon was first zeroed.

Be advised that changes in season, time of day and/or changes in temperature may slightly shift your point of impact. Double checking your zero before hunting is recommended.


Possible cause

After shooting, the aiming reticle may not be in the centre of the display. This is normal and is not a defect.

Possible cause

Wrong settings.              

Solution

Adjust the riflescope according to the Powering on and Image Setting section.

Check the outer surfaces of the lenses of the thermal imaging channel and the eyepiece and, where necessary, wipe away dust, condensation, frost, etc. In cold weather, you can use special anti-fogging coatings (e.g., the same as for corrective glasses).

Possible cause

Password in the riflescope was changed.

Solution

Delete network and connect again inserting the password saved in the riflescope.


Possible cause

There are too many Wi-Fi networks in the area where the riflescope is located which may cause signal interference.

Solution

To ensure stable Wi-Fi performance, move the riflescope to an area with few or no Wi-Fi networks.

Solution

Switch the device's Wi-Fi bandwidth.


Possible cause

The device has a 5 GHz network enabled, but the smartphone only supports 2.4 GHz.

Solution

Switch the device's Wi-Fi bandwidth to 2.4 GHz.


More information on solving problems with connection to Stream Vision 2 by following the link.

Possible cause

Smartphone or tablet is out of range of a strong Wi-Fi signal. There are obstacles between the device and the smartphone or tablet (e.g., concrete walls).

Solution

Relocate smartphone or tablet into the Wi-Fi signal line of sight.


More information on solving problems with connection to Stream Vision 2 by following the link.

Possible cause

The object is behind glass, which obstructs thermal vision.

Solution

Remove the glass.

Possible cause

These problems may occur during observation in adverse weather conditions (snow, rain, fog etc.).


Solution

The dots are caused by the peculiarities of the manufacturing technology of microbolometers, digital sensors or display and not a defect.

Possible cause

In warm climates, objects in the background of a thermal image heat up differently because of thermal conductivity, generating a high temperature contrast and a sharper thermal image.

In cold climates, objects in the background of a thermal image will cool down to roughly the same temperature, which leads to a greatly reduced temperature contrast and a degraded image quality. This is normal for all thermal imaging devices.

Possible cause

When the illumination decreases, the device automatically switches to the black-and-white mode of the digital channel to reduce the level of color noise in the image.

Solution

When the device is moved to a location with sufficient light, the image will automatically turn into color.

Possible cause

Lens cover closed.

Solution

Open the covers of the thermal imaging and digital channels.


Possible cause

Channel is turned off.

Solution

Turn on the desired channel in the “Viewing Channel Activation” item of the General Settings section in the main menu.

Possible cause

The Bluetooth module is not turned on.

Solution

Turn on the Bluetooth module according to the instructions (see the Bluetooth section).


Possible cause

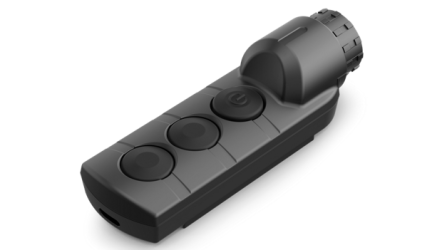
The Remote control is not activated.

Solution

Activate the remote control according to instructions (see the Remote Control Activation section).


Possible cause

The Remote Control is out of range of the device.

Solution

Return to the device coverage area.


Possible cause

Remote control battery low.

Solution

Install a new CR2032 battery as follows: unscrew the screws on the rear cover of the Remote Control, remove the cover, install a new battery, and screw the cover with screws.

Possible cause

Ballistic calculator uses angle/elevation readings of your riflescope in order to calculate the SPOA. The elevation angle of the riflescope while inputting the distance is not matching the angle of aiming.

Solution

Keep the reticle of the riflescope on the target while manually inputting the distance data.